Setting up Wireguard
Quick, easy and secure? Look no further, Wireguard is here to save the day! ![]()
Configuring the server
We are going to use the Raspberry Pi as the server. From there we can reach any other devices in the network.
- We start by installing the service
sudo apt install wireguard. - Then we generate the private and public key. We will share the public key with our peers to do the authentication.
wg genkey | tee privatekey | wg pubkey > publickey - Add a new interface
ip link add dev wg0 type wireguard - Add an IP to the interface
ip address add dev wg0 192.168.2.1/24 - Add your config to the config file
/etc/wireguard/wg0.conf - Activate the interface
ip link set up dev wg0
Server config:
[Interface]
Address = 192.168.2.1/24
SaveConfig = true
ListenPort = 51820
PrivateKey = (removed)

[Peer]
# PC
PublicKey = IvrOutjImsgCS2Qa9Yfff9y8tZRl9pA3xIjLMZC+RjY=
AllowedIPs = 192.168.2.2/32

[Peer]
# Private Mac
PublicKey = 5umYiqz0IMDVGx3pgr9F+8Gc6Y7gJyXyb/pNJvncoH8=
AllowedIPs= 192.168.2.3/32
Allow connections to WireGuard (and through)
Since out Raspberry is being NAT we need to:
- Add port forwarding to
UDP/51820 - Allow access through our local firewall
ufw allow 51820/udp - I also want to allow SSH
sudo ufw allow from 192.168.2.0/24 proto tcp to any port 22
Configure the client
I’ll be using a Mac so let’s download the app from the App store. The app is nice enough to generate keys for us so we can just configure the IPs and share the public key between the devices.
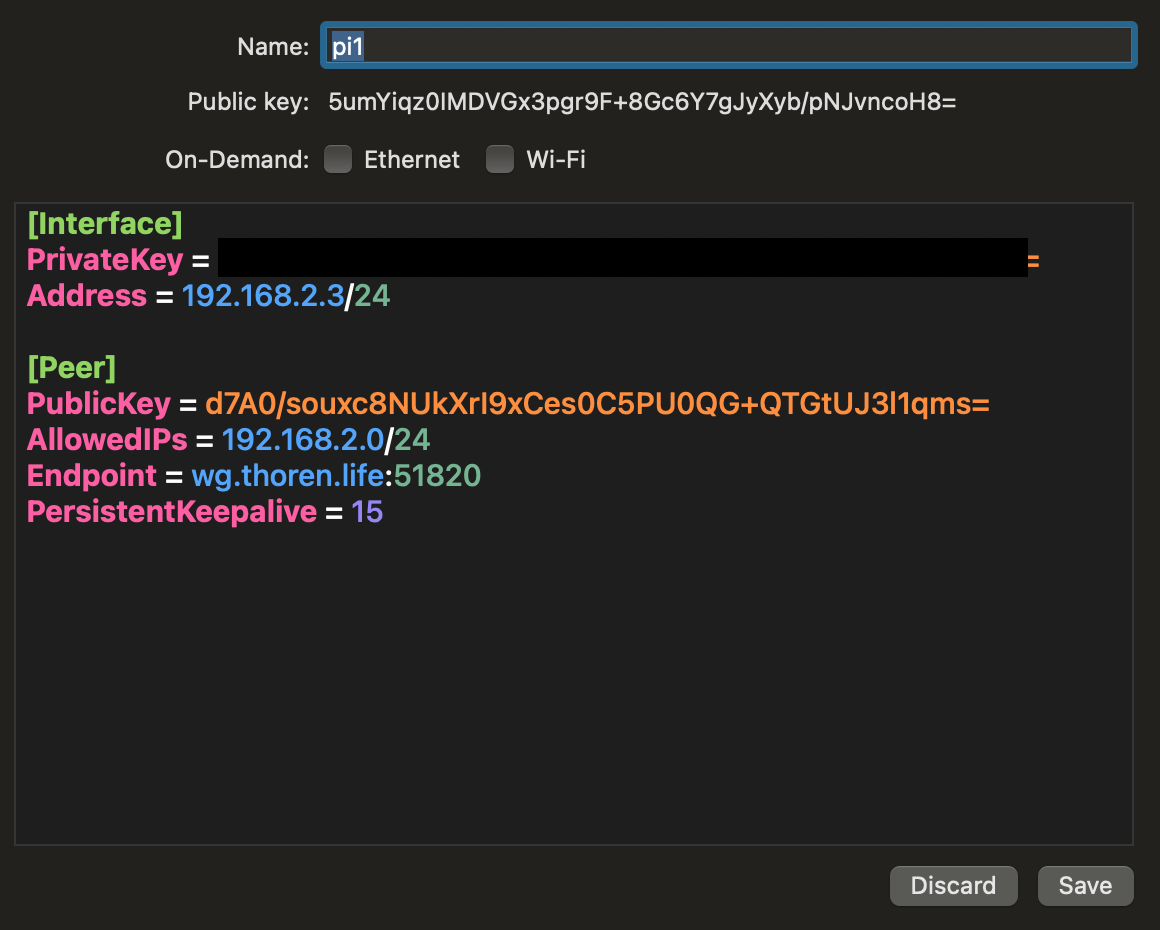 The
The PersistentKeepAlive will make Wireguard keep sending empty packets to prevent the tunnel from being closed down.
 Troubleshooting
Nothing ever is as easy as it seems. But as always PEBKAC. Really, reeeeally read through the config file!
- Is the public key correct?
- Is the IP address and subnets correct?
- Is the clients endpoint hostname AND port correct?
- Is the config applied? I.e. have you done a reload or restart of the service?
- And if you have, is the config actually applied? I had this issue where I thought I had changed the config, but I actually had not. Morale of that story was to:
stopthe service, edit config,startthe service.
- And if you have, is the config actually applied? I had this issue where I thought I had changed the config, but I actually had not. Morale of that story was to:
Tools and tricks to help pin-point the issue:
- Validate the connection; look for the client trying to access out server
sudo tcpdump port 51820 - Check the damn config!
sudo wg showconf wg0
Now then?
Client: $ ping 192.168.2.1
Yeeep. We are up and running!
Client:
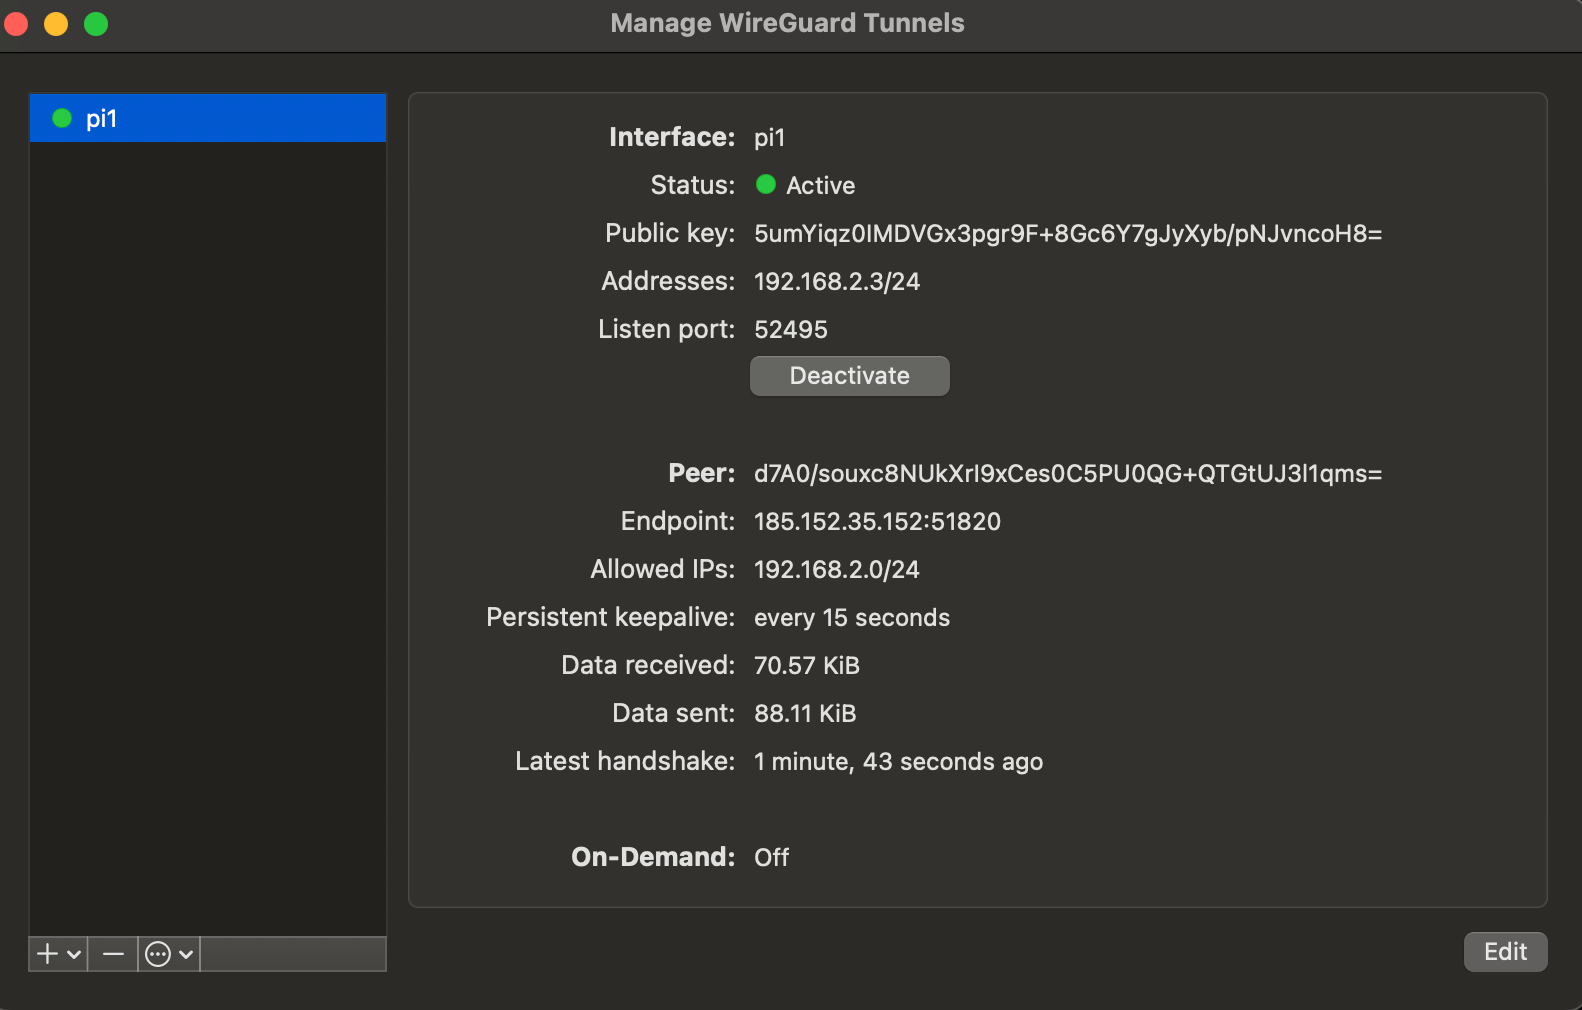
Server: wg show
interface: wg0
  public key: d7A0/souxc8NUkXrI9xCes0C5PU0QG+QTGtUJ3l1qms=
  private key: (hidden)
  listening port: 51820

peer: 5umYiqz0IMDVGx3pgr9F+8Gc6Y7gJyXyb/pNJvncoH8=
  endpoint: 77.16.40.224:15205
  allowed ips: 192.168.2.3/32
  latest handshake: 48 seconds ago
  transfer: 62.92 KiB received, 62.61 KiB sent

peer: IvrOutjImsgCS2Qa9Yfff9y8tZRl9pA3xIjLMZC+RjY=
  allowed ips: 192.168.2.2/32
Conclusion
WireGuard is very clean, with a minimal config and there is not thaaaat much to mess up so that even an idiot like can make it work.